자바스크립트 정리
<canvas>는 canvas api를 사용할 수 있는 창이다.
하드웨어 가속이 가능하다.
퀄리티를 올리기 위해서 width와 height는 자바스크립트로만 수정한다.
const canvas = document.querySelector("canvas");
const ctx = canvas.getContext("2d");
canvas.width = 800;
canvas.height = 800;
ctx.fillRect(50,50,100,200);
===================
canvas {
    width: 800px;
    height: 800px;
    border:5px solid black;
}
body{
    display: flex;
    justify-content: center;
    align-items: center;
}
=====================
<!DOCTYPE html>
<html lang="en">
<head>
    <meta charset="UTF-8">
    <title>Meme Maker</title>
    <link rel="stylesheet" href="styles.css">
</head>
<body>
<canvas>

</canvas>
<script src="app.js"> </script>
</body>
</html>
fillRect는 일종의 숏컷임 원래는 출발지와 목적지를 정하고 선으로 그은 후 채우는 과정을 거처야함
ctx.rect(50,50,100,200);
ctx.stroke();
// ctx.fill();
ctx.rect(50,50,100,100);
ctx.rect(150,150,100,100);
ctx.rect(250,250,100,100);
ctx.rect(350,350,100,100);
ctx.stroke();

ctx.rect(50,50,100,100);
ctx.rect(150,150,100,100);
ctx.fill();
ctx.rect(250,250,100,100);
ctx.rect(350,350,100,100);
ctx.stroke();

canvas는 하나의 경로임 따라서 한곳에 설정을 넣으면 모든 경로에 전파된다고 생각하면됨
따라서 설정을 그만 넣고 싶으면 새로운 패스(경로)를 만들면 된다.
ctx.rect(50,50,100,100);
ctx.rect(150,150,100,100);
ctx.fill();

ctx.beginPath();
ctx.rect(250,250,100,100);
ctx.rect(350,350,100,100);
ctx.fillStyle="blue";
ctx.fill();
사실 rect도 숏컷이다. 점과 점을 이어주는 것을 알아서 해주기 때문이다.
ctx.moveTo(50,50);
ctx.lineTo(150,50);
ctx.lineTo(150,150);
ctx.lineTo(50,150);
ctx.lineTo(50,50);
ctx.fill();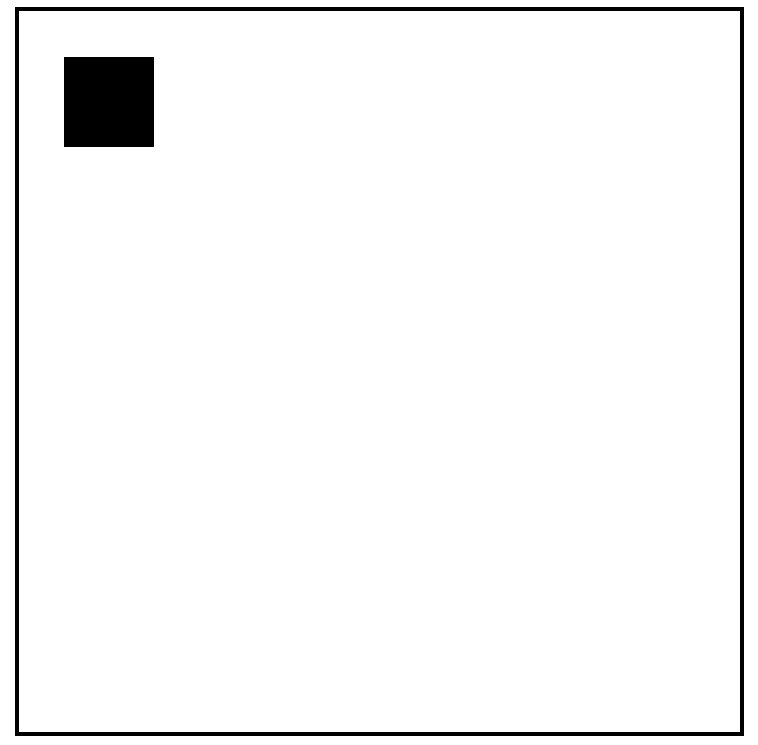
ctx.moveTo(50,50);
ctx.lineTo(150,50);
ctx.lineTo(150,150);
ctx.lineTo(50,150);
ctx.lineTo(50,50);
ctx.stroke();
ctx.fillRect(200,200,50,200);
ctx.fillRect(400,200,50,200);
ctx.lineWidth = 20;
ctx.strokeRect(300,300,50,100);
ctx.fillRect(200,200,200,20);
//지붕
ctx.moveTo(200,200);
ctx.lineTo(325,100)
ctx.lineTo(450,200)
ctx.fill();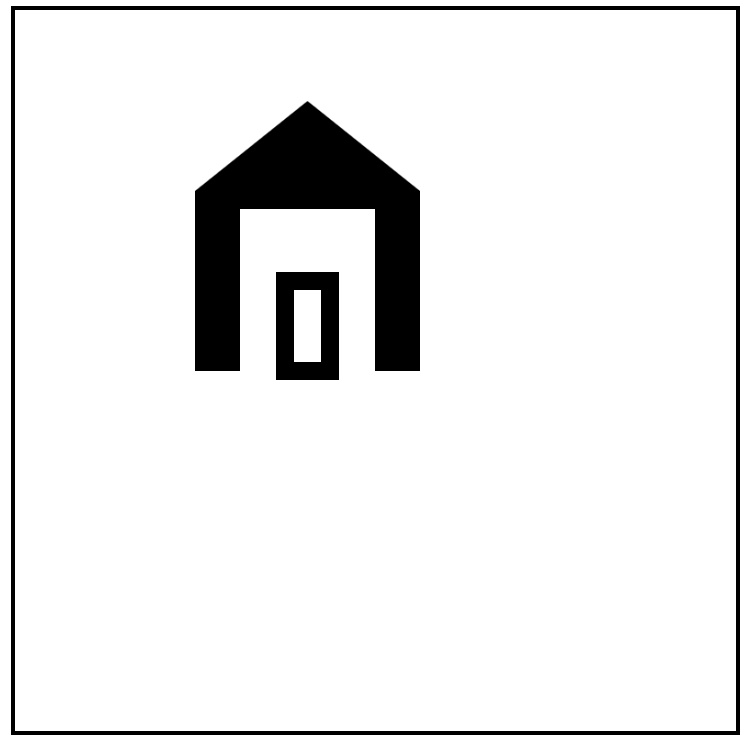
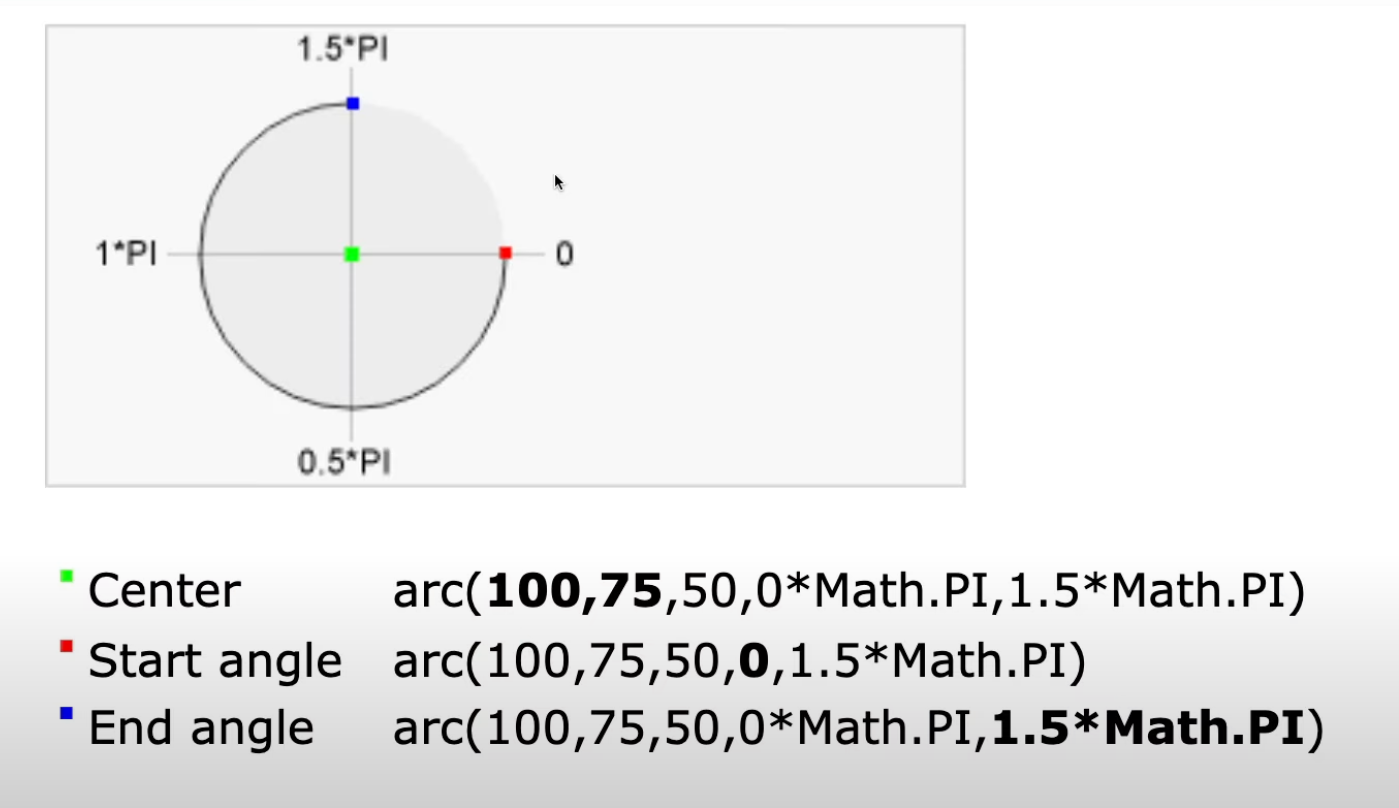
ctx.arc()를 하게 되면 현재 path의 마지막 좌표와 생성될 arc의 첫 번째 좌표 사이에 ctx.lineTo()가 작동되어서 의도치 않은 선이 생긴다.
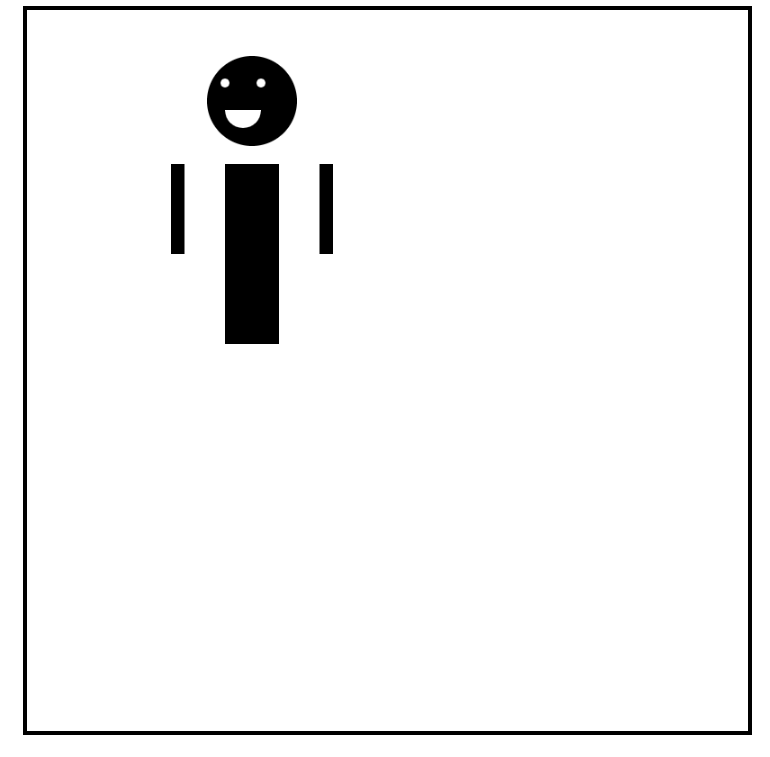
ctx.fillRect(200 - 40,200-30,15,100);
ctx.fillRect(365 - 40,200-30,15,100);
ctx.fillRect(260 - 40,200-30,60,200);
//radius가 의미하는 것은 반지름임
ctx.arc(250,100,50,0,2*Math.PI);
ctx.fill();

ctx.beginPath();
ctx.fillStyle="white";
ctx.arc(260,80,5,0,2*Math.PI);
ctx.arc(220,80,5,0,2*Math.PI);

ctx.moveTo(240,110);
ctx.fillStyle="white"
ctx.arc(240,110,20,0,1*Math.PI);
ctx.fill();
ctx.fillRect(200 - 40,200-30,15,100);
ctx.fillRect(365 - 40,200-30,15,100);
ctx.fillRect(260 - 40,200-30,60,200);
//radius가 의미하는 것은 반지름임
ctx.arc(250,100,50,0,2*Math.PI);
ctx.fill();

ctx.beginPath();
ctx.fillStyle="white";
ctx.arc(260,80,5,0,2*Math.PI);
ctx.arc(220,80,5,0,2*Math.PI);

// ctx.moveTo(240,110);
ctx.fillStyle="white"
ctx.arc(240,110,20,0,1*Math.PI);
ctx.fill();
드로잉
const ctx = canvas.getContext("2d");
canvas.width = 800;
canvas.height = 800;
ctx.lineWidth=2;
function onClick(event){
    ctx.lineTo(event.offsetX,event.offsetY);
    ctx.stroke();
}

canvas.addEventListener("click", onClick);
const canvas = document.querySelector("canvas");
const ctx = canvas.getContext("2d");
canvas.width = 800;
canvas.height = 800;
ctx.lineWidth=2;
const colors = [
    "#ff3838",
    "#ffb8b8",
    "#c56cf0",
    "#ff9f1a",
    "#fff200",
    "#32ff7e",
    "#7efff5",
    "#18dcff",
    "#7d5fff",
];
function onClick(event){
    ctx.beginPath();
    ctx.moveTo(0,0);
    const color = colors[Math.floor(Math.random()*colors.length)];
    ctx.strokeStyle = color;
    ctx.lineTo(event.offsetX,event.offsetY);
    ctx.stroke();
}

canvas.addEventListener("mousemove", onClick);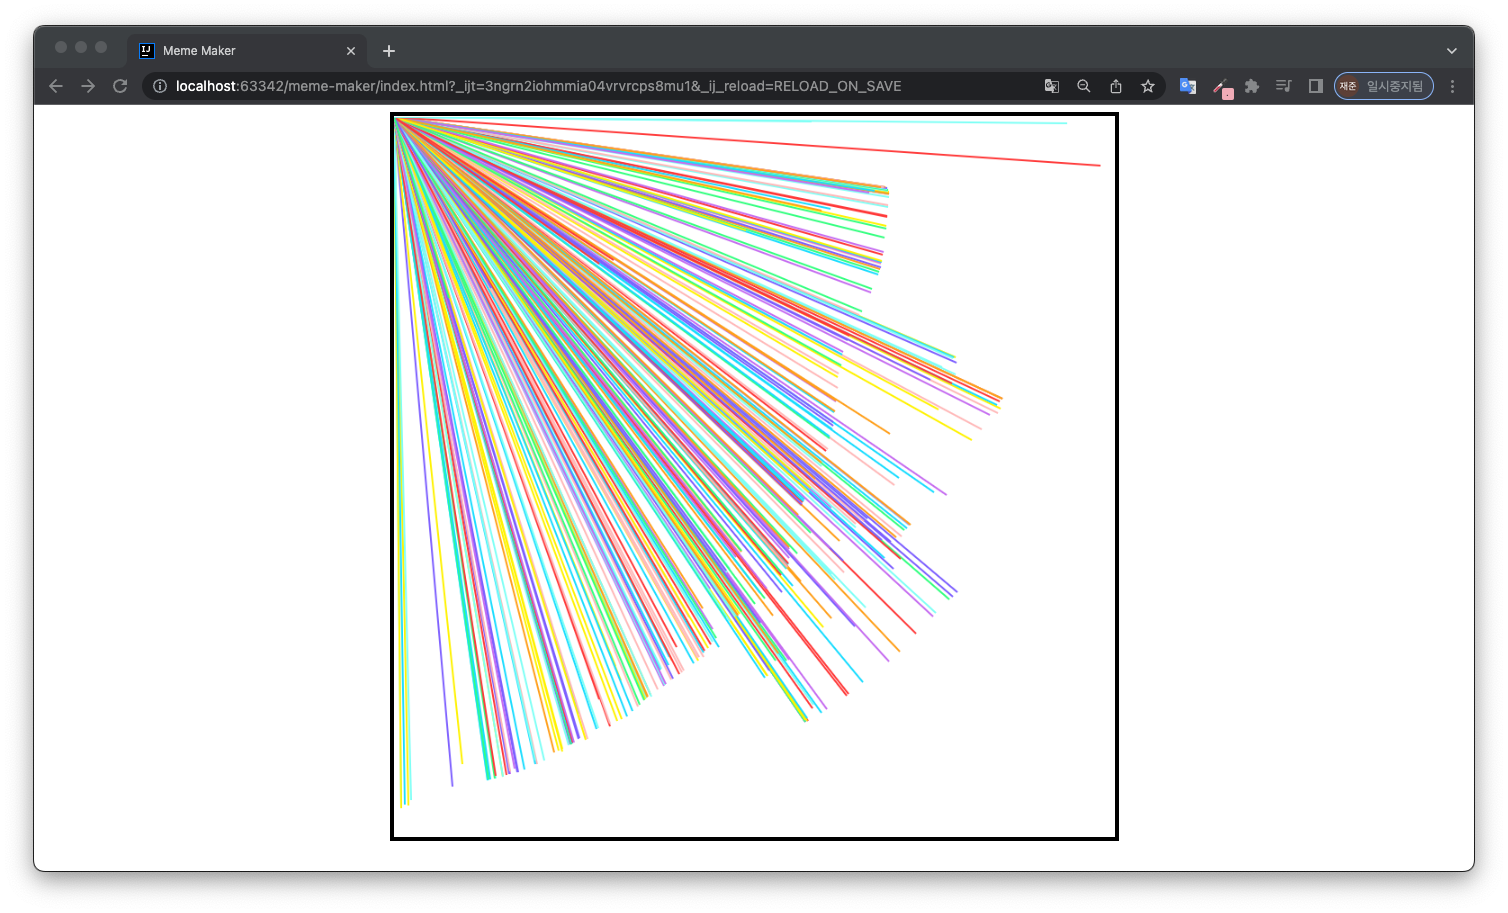
<div class="color-option" style="background-color: #3498db" data-color="#3498db"></div>data-ABCD는
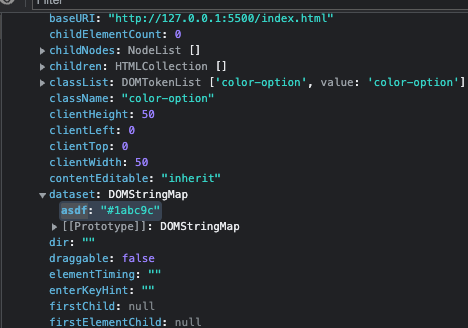
dataset에 ABCD로 저장된다.
function onDoubleClick(event){
    ctx.save();
    const text = textInput.value;
    ctx.lineWidth=1;
    ctx.strokeText(text,event.offsetX,event.offsetY);
    ctx.restore();
}
ctx.save()는 현재의 캔버스의 환경설정을 저장함
ctx.restore은 저장했던 환결설정을 복구함
function onSaveClick(){
    const url = canvas.toDataURL();
    const a = document.createElement("a");
    a.href = url;
    a.download = "myDrawing.png"
    a.click();
}
canvas를 데이터url로 만드는거임
a태그를 만들고 그 태그의 링크를 canvas url로 지정함
https://mine-it-record.tistory.com/445
[HTML] <a> 태그로 가볍게 특정 파일 다운로드 받기 (ft. download attribute)
- tag download Attribute - 태그를 통해 간단하게 파일 다운로드 하는 방법에 대해 알아보자. 태그에는 download 라는 속성이 존재하는데 이는 href에 지정된 파일을 다운로드해주는 기능이다. 이렇듯 복
mine-it-record.tistory.com
a 태그에 download 옵션을 추가하고 이름으로 myDrawing.png로 지정한후 자바스크립트에서 클릭을 하게 하여 결과적으로 파일이 다운로드 됨
button{
    all:unset;
}
모든 css 속성을 삭제한다. border:0이런식으로 css를 삭제할 필요가 없다.

